How To Add Instance Stores To EC2 Instances
Many EC2 instance types come with fast local storage. One way to take advantage of this fast local storage is to use it as a disk cache for ObjectiveFS. This article describes how to add instance store to your EC2 instance, so you can use SSD or hard drive for local storage.
-
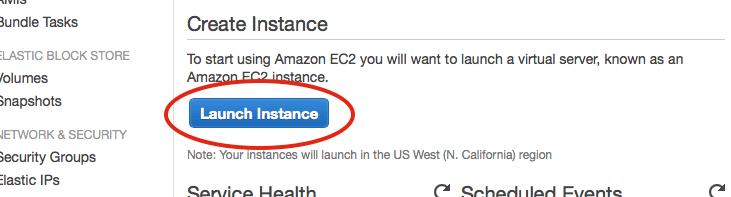
Open your Amazon EC2 console at https://console.aws.amazon.com/ec2and click on “Launch Instance”.
-
Choose your AMI and instance type in the next 2 steps, and click “Next: Configure Instance Details”. To get SSD for instance store, please choose an instance type with SSD.

-
Complete “Step 3: Configure Instance Details” with your settings, and click “Next: Add Storage”

-
In “Step 4: Add Storage”, click “Add New Volume” and choose instance store and device location. In this example, we choose
Instance Store 0on/dev/sdb.
Repeat this step to add all available instance stores.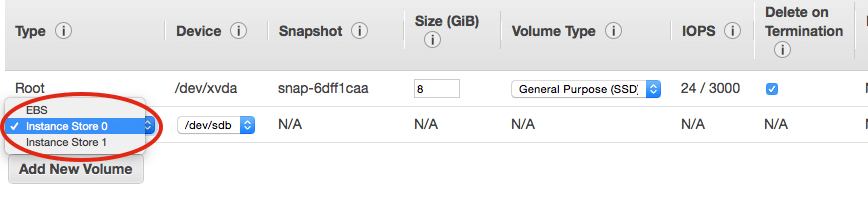
-
Click “Review and Launch” and complete the steps to launch this EC2 instance.
Note: Instance stores can only be added to an EC2 instance before launch.
To use the newly added instance store as a disk cache, see how to mount an instance store on EC2 for disk cache
by ObjectiveFS staff, September 30, 2015
ObjectiveFS is a shared file system for OS X and Linux that automatically scales and gives you scalable cloud storage. If you have questions or article idea suggestions, please email us at
お問い合わせはこちら
Related articles: